
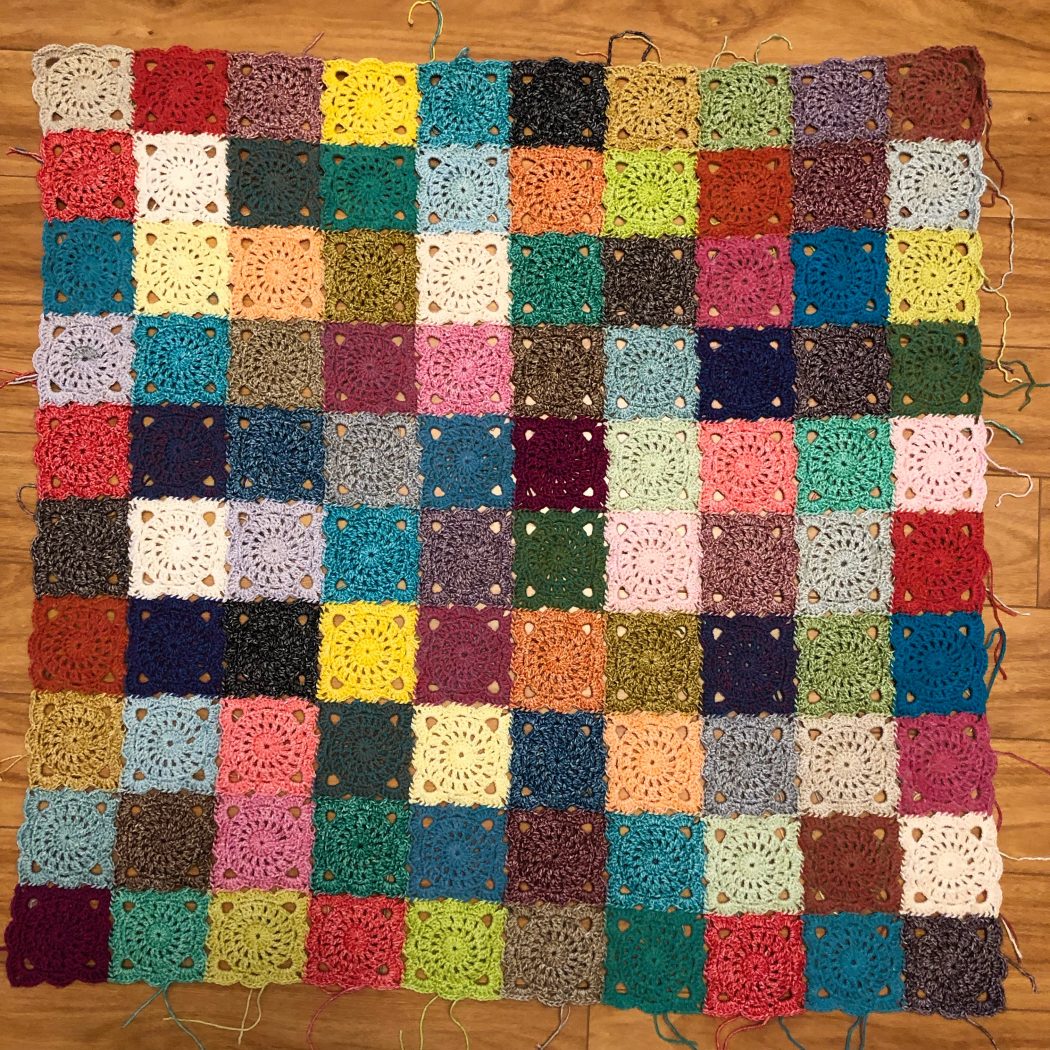
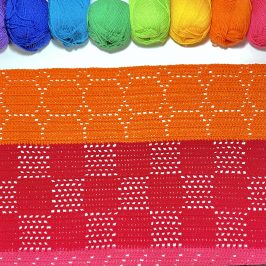
Ever wonder what you’ll do with all those gorgeous mini 10g balls of Scheepjes? Okay, BESIDES drool over the gorgeous spectrum of colors? Wonder no more! This pattern maximizes your purchase into a stunning 35” sq blanket using the River/Stone Pack using a 10×10 layout. My original blanket was created with a 4mm hook and the Scheepjes Stone & River Washed Color Pack. My squares came to about 3.5” across. Make an even larger blanket using the Catona and a 18×12 layout for a 63”x42” blanket (you’ll have 2 unused balls of Catona).
For color placement, I threw the balls into a bag an drew them out for a truly random patchwork effect. After I used a color, it got tossed in a second bag. When I’d used all the colors once, I began drawing from the second bag.
This square can be made with ANY yarn and appropriate hook.
Can I REALLY get 2 Squares from one 10g ball?
Each 10g ball of the River, Stone, or Catona should get you two squares, but remember, yarn wrapper yardage is always “approximate” – as is the 10g weight on the wrapper.
- Be sure to make your ends no longer than 4 inches.
- TEST this by working one square then, WITHOUT CUTTING YOUR YARN, unravel the rest and work a second square from the opposite end of your yarn ball. Did you get two squares with enough between for two ends that can be sewn in well?
IF NOT-
- Try a smaller hook size.
- Remember the 10g/25m is an approximation – this can mean that you find yourself short a few stitches at the end of the second square in a color. No worries – just frog back to R2 and make sure your tension is consistent, or even a little tighter on the chains going forward, and this should hopefully give you what you need to finish with enough to weave in your end. This happened to me half a dozen times with the Riverwashed/Stonewashed pack. So out of 50 colors, only a few were “short.”
- There was ONE color in the pack I couldn’t get two squares from, no matter how perfect my tension. Because these squares are joined as you go, you can’t “test” each color to see if there is enough for two. So, SAVE YOUR LEFTOVERS UNTIL THE END! I chose some left over from a very similar shade to use at the center of the square that I just couldn’t make work. You can’t notice the cheat once it’s finished beside the other squares.
Stitches & Techniques – US Terms
SLST – slip stitch
SC – single crochet
DC – double crochet
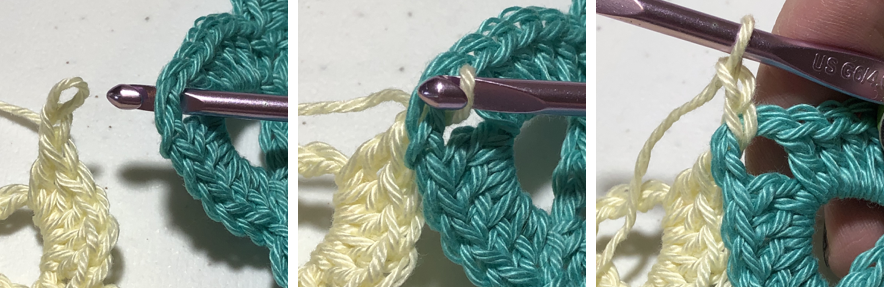
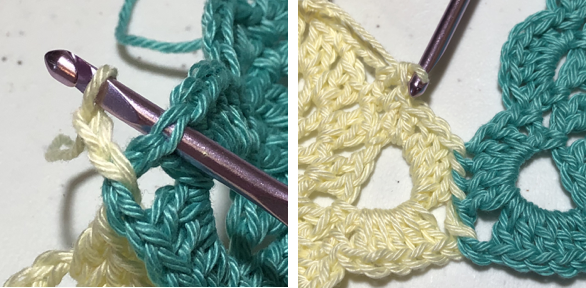
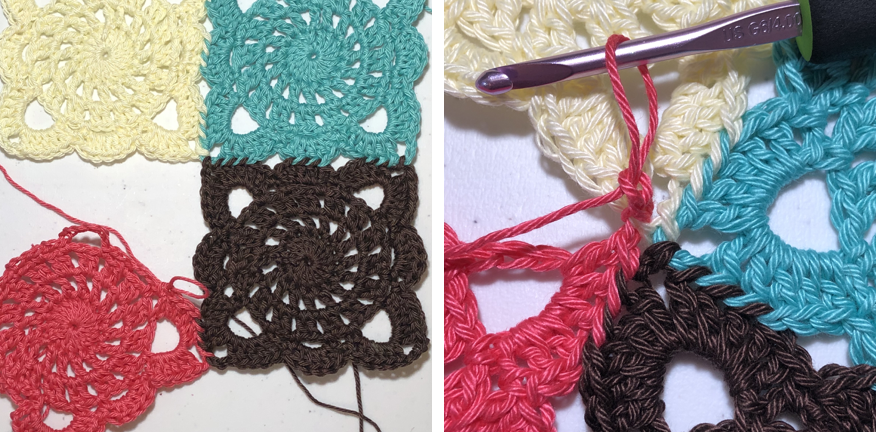
DLPT – Drop Loop and Pull Through
This is used in R5 every square after the first. Drop loop from hook, insert hook from front-to-back into the mirroring sp or st of the square you’re joining to (HINT: it’s the exact same stitch/space you’re about to make on your current square) and pull the loop through. Now the loop is back on your hook, but the other square is caught with it, and you just finish your stitch as usual.
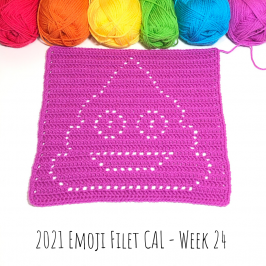
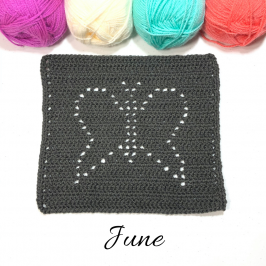
Stoney River Square Crochet Pattern
Start with a Magic Circle
R1: Ch3 (counts as dc here and throughout), 15 dc into magic circle, slst to first st. [16 dc]
R2: Ch4 (dc + ch1), *dc, ch1* – in each stitch around. Slst to first st. [16 dc / 16 ch1 sps]
R3: SLst into ch1 space. Ch3, dc into same space, ch1, *2dc into next sp, ch1* – repeat around. Slst into first st. [32 dc / 16 ch1 sps]
R4: Slst into next st, slst into ch1 sp, ch1, sc into same space, *ch 6, sc into next ch1 sp, ch2, sc into next sp, ch3, sc into next sp, ch2, sc into next sp* – repeat around and slit into first sc.
R5: Slst into ch6 sp. Ch3, 4dc, ch3, 5dc, *sc into ch2 sp, 5dc into ch3 sp, sc into ch2 sp, [5dc, ch3, 5dc] into ch6 sp* – repeat around and slst to beginning st. Fasten off.
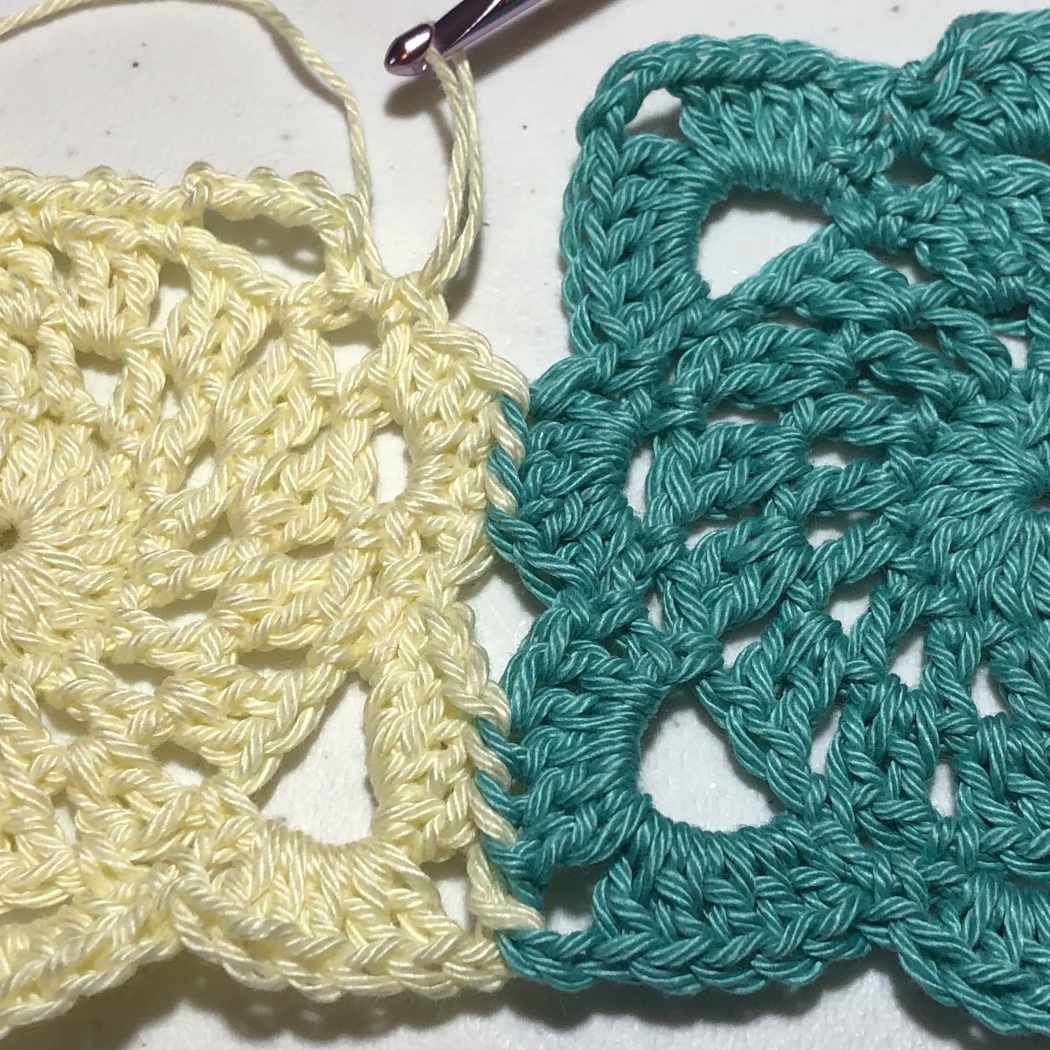
R5 for Proceeding Squares & Rows
All your other squares will be joined-as-you-go while you complete R5. If you’re seasoned at the join-as-you go method, here is a “short-hand” joining guide (otherwise scroll down to see a FULL picture tutorial):
- The center ch of corners are joined.
- The first 3dc before & after the corner are joined.
- The center 3dc in the 5dc group at the middle of the square are joined.
- Join up corners directly above/adjacent each other – no crossing on the diagonal to make any corner connections.
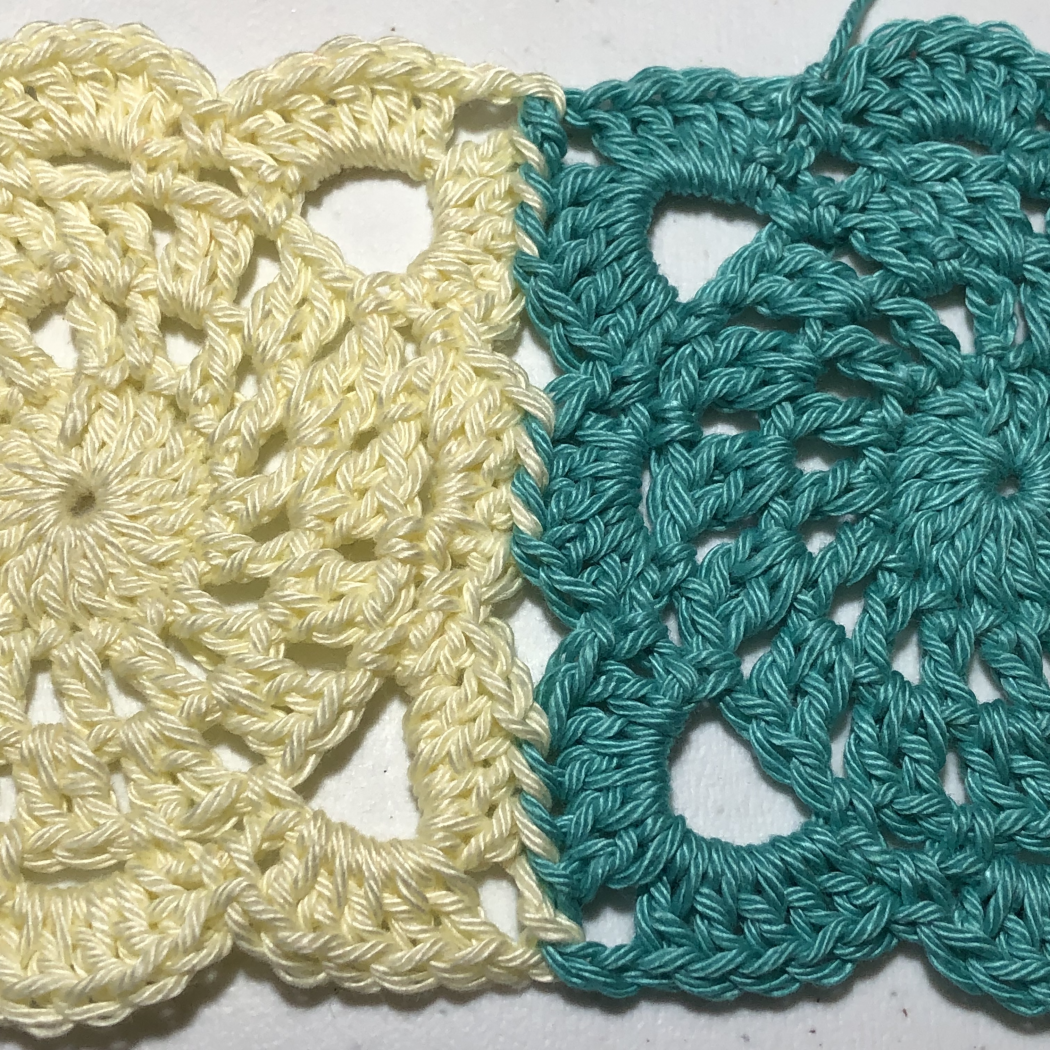
R5 one-sided join, all squares in the First Row-
(Start Side 1) Slst into ch6 sp. Ch3, 4dc, ch3, (Side 2) 5dc more into ch6 sp, sc into ch2 sp, 5dc into ch3 sp, sc into ch2 sp, 5dc into ch6 sp, ch3, (Side 3) 5dc more into ch6 sp, sc into ch2 sp, 5dc into ch3 sp, sc into ch2 sp, 5dc into ch6 sp,
(Side 4, joining side) Ch1, DLPT adjacent corner, ch2, DLPT 3dc,
2dc, sc in ch2 sp, dc in ch3 sp, DLPT 3dc, dc, sc in ch2 sp,
2dc in ch6 sp, DLPT 3dc, ch1, DLPT adjacent corner, ch2, (Finish Side 1) 5dc more in ch6 sp, sc into ch2 sp, 5dc into ch3 sp, sc into ch2 sp, slst to starting st.
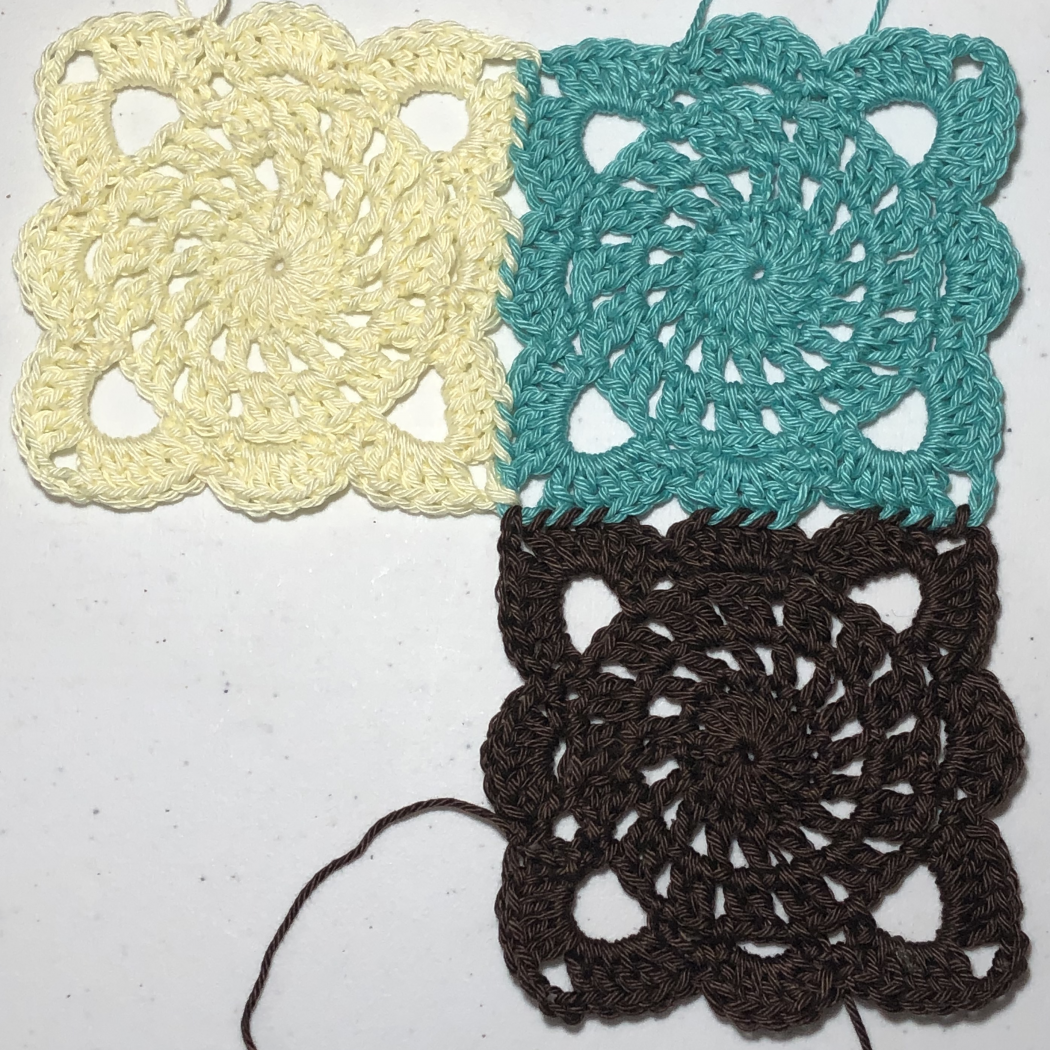
One-sided join, when the square begins a New Row – the top corners (and side between) will join to the square DIRECTLY ABOVE them.
R5: (Start of Side 1) Slst into ch6 sp. Ch3, 4dc, ch3, (Side 2) 5dc more into ch6 sp, sc into ch2 sp, 5dc into ch3 sp, sc into ch2 sp, 5dc into ch6 sp, ch3, (Side 3) 5dc more into ch6 sp, sc into ch2 sp, 5dc into ch3 sp, sc into ch2 sp, 5dc into ch6 sp, (Side 4, joining side) Ch1, DLPT above corner, ch2, DLPT 3dc, 2dc, sc in ch2 sp, dc in ch3 sp, DLPT 3dc, dc, sc in ch2 sp, 2dc in ch6 sp, DLPT 3dc, ch1, DLPT above corner, ch2, (Finish Side 1) 5dc more in ch6 sp, sc into ch2 sp, 5dc into ch3 sp, sc into ch2 sp, slst to starting st.
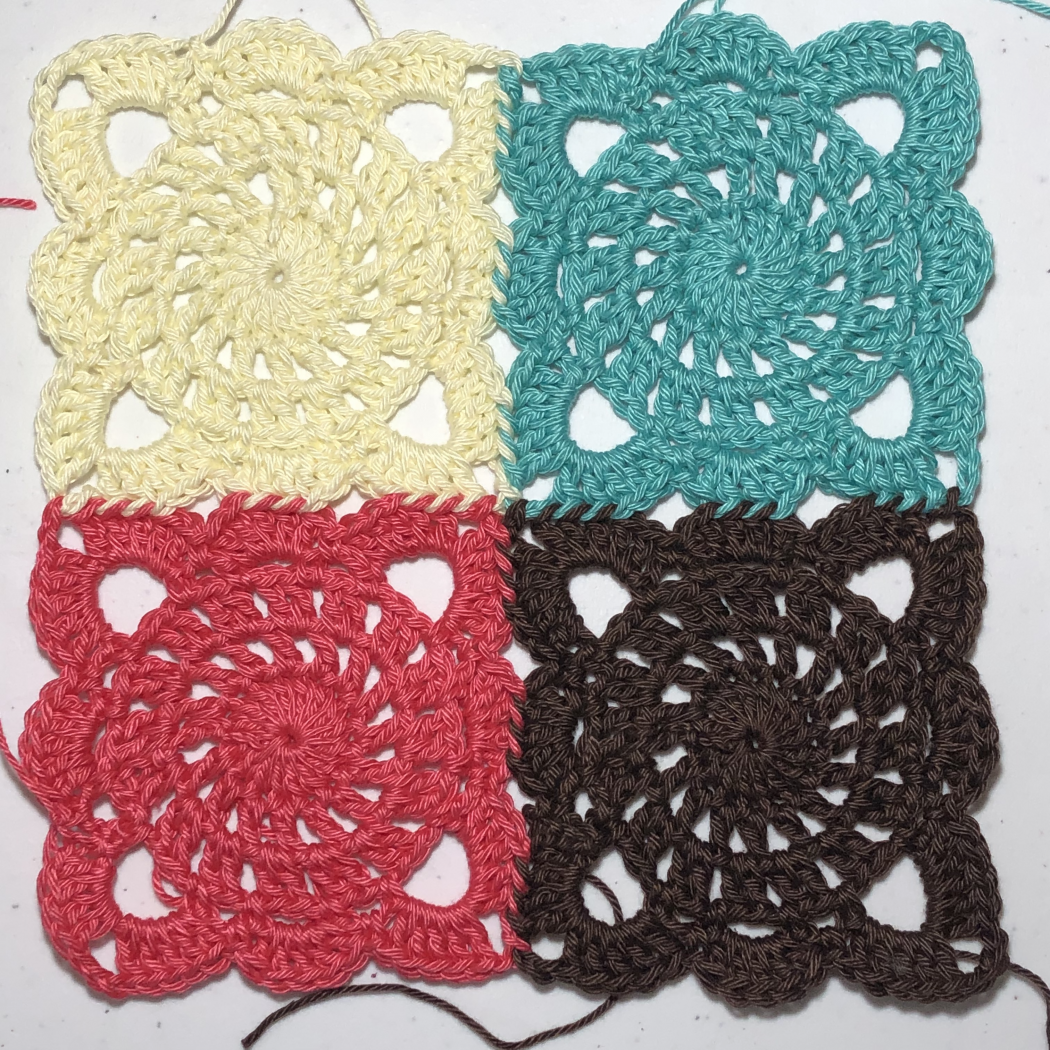
Two-sided joins, all squares following the first in a New Row-
- The SECOND corner and following side, need to join to the ADJACENT square.
- The THIRD corner, following side, and FOURTH corner need to join to the square DIRECTLY ABOVE them.
R5: (Start of Side 1) Slst into ch6 sp. Ch3, 4dc, ch3, (Side 2) 5dc more into ch6 sp, sc into ch2 sp, 5dc into ch3 sp, sc into ch2 sp, 5dc into ch6 sp, (Side 3, joining side) Ch1, DLPT adjacent corner, ch2, DLPT 3dc, 2dc, sc in ch2 sp, dc in ch3 sp, DLPT 3dc, dc, sc in ch2 sp, 2dc in ch6 sp, DLPT 3dc, ch1, DLPT above corner, ch2, (Side 4, joining side) DLPT for 3dc, 2dc, sc in ch2 sp, dc in ch3 sp, DLPT 3dc, dc, sc in ch2 sp, 2dc in ch6 sp, DLPT 3dc, ch1, DLPT above corner, ch2, (Finish Side 1) 5dc more in ch6 sp, sc into ch2 sp, 5dc into ch3 sp, sc into ch2 sp, slst to starting st.
Ann Schermer
I have fallen in love with your patterns! The way you present them with the numbering and the graphic pattern, I’ve learned two new ways to read patterns. These are easy and simple to follow and all I have to do is remember to count and space correctly. LOL
Thank you for your creations. My grandchildren will have fun blankets to grow up with.
becca
Thank you so much! I am so glad you enjoy them. I can’t wait to see all you make for them. 🙂
Becca
Margaret L Lennox
Looking forward to smiling “till I ‘drop’ a stitch”! %)
becca
🙂
Kathryn
Love these squares! I found your site from the Put Your Best Hook Forward link party.
becca
Awesome!
Zianna Day
love to crochet
becca
Me too! It is my sanity hobby.