
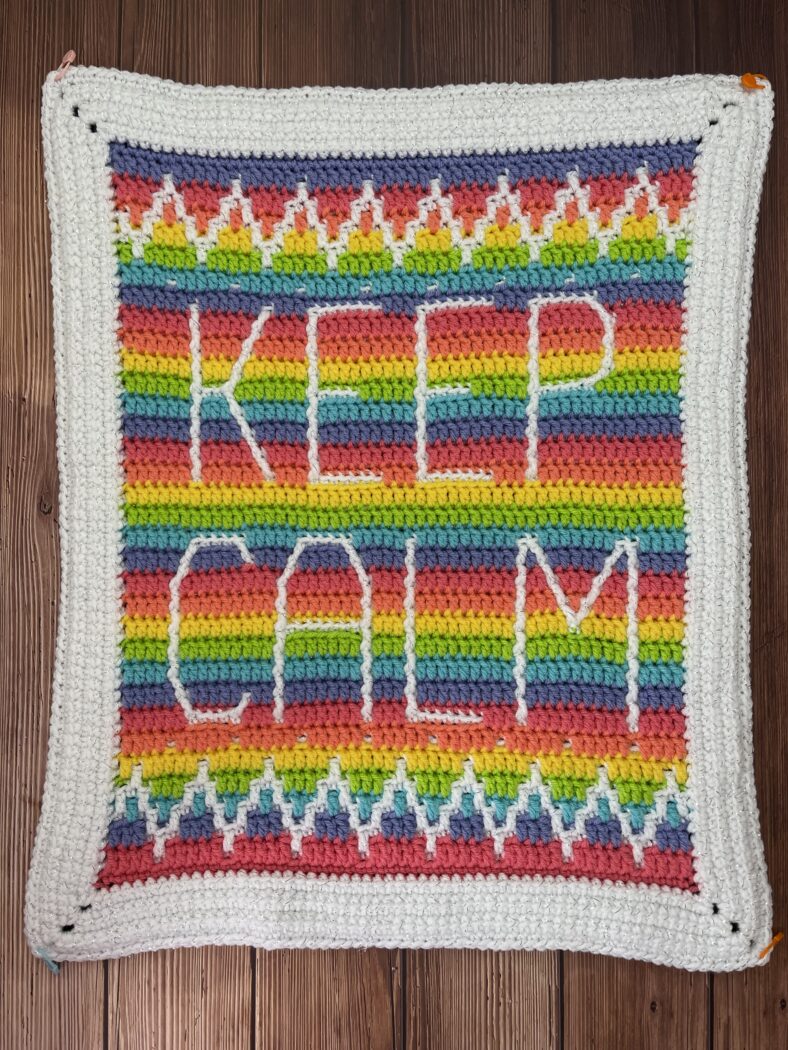
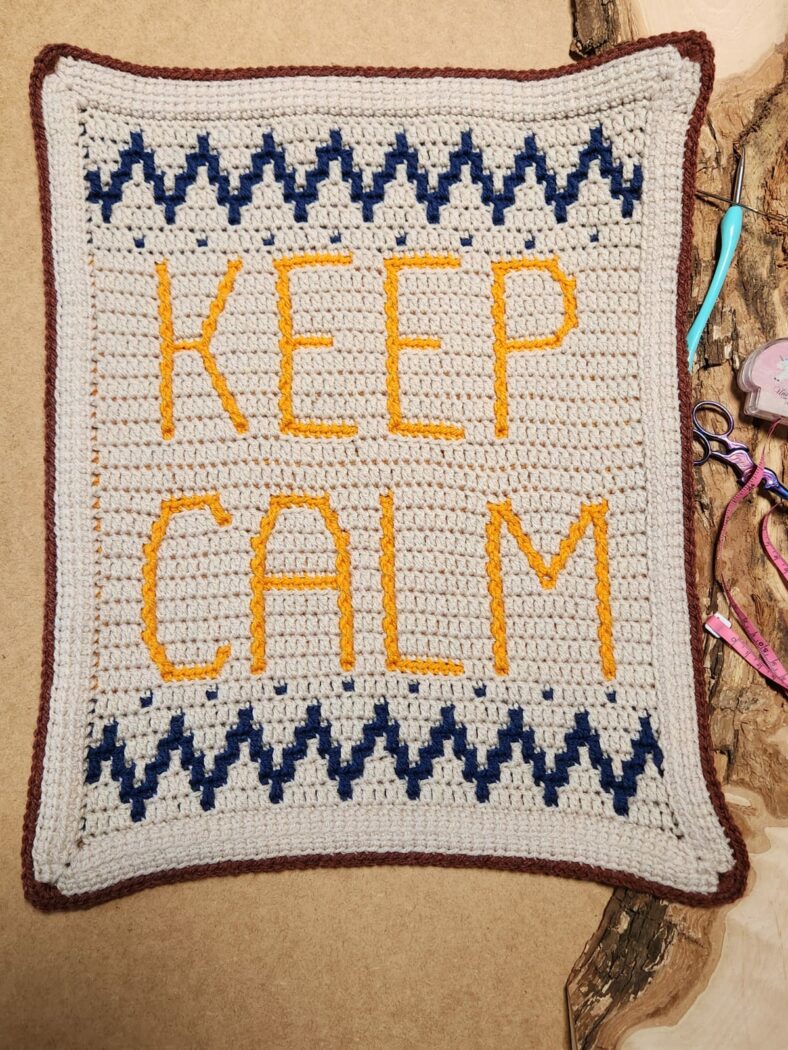
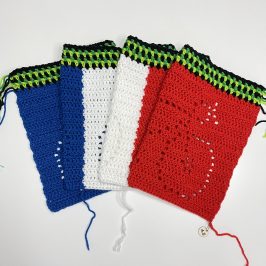
The 2025 Mosaic Crochet-a-long is HERE at last! Below you will find January’s mosaic block pattern, the headliner block for the CAL: Keep Calm.
First, you NEED to read the supplies & info post to familiarize yourself with the following important pattern information:
- this year’s CAL options
- the supplies needed to create each month’s block
If you would like a printable version of the entire Mosaic version of the 2025 Keep Calm CAL (with graphs) in eBook form, you can use the code: rainbowsparkle for 20% off. Find the Mosaic version here.
Stitches & Terms – US Crochet Terms
- st(s) – stitch(es)
- ch(s) – chain(s)
- BLO – back loop only
- FL – front loop
- fp – front post
- BE – beginning edge = sc in both loops, ch1, sk next st
- EE – ending edge = ch1, sk nest st, sc in both loops of final st
- sc – single crochet
- dc – double crochet
- ddc – drop double crochet = dc made into the FL of the st 2 rows below
- -R = 2 rows below and 1 st to the right
- -2R = 2 rows below and 2 sts to the right
- -L = 2 rows below and 1 st to the left
- -2L = 2 rows below and 2 sts to the left
- fpddc – ddc made around the FP of the ddc below
- -R = below and 1 st to the right
- -2R = below and 2 sts to the right
- -L = below and 1 st to the left
- -2L = below and 2 sts to the left
- -2togR&L = below 1 st to the right & below 1 st to the left made as a dc2tog
Tips for diagonal stitches-
- better to be too loose than too tight! Take care to pull up your loops a little looser than normal to ensure your diagonals (especially the -2R/L) can span the diagonal without pulling at your work too much.
- Going around the post will help it to look smoother, but is not a “rule” and I’m not even sure anyone else does this. I decided to work diagonals this way to avoid the front loops pulling up too much due to the stretch of diagonal stitches. Using the post along with making your diagonals looser, will create a nicer looking stitch and finished design line.
Keep Calm Block: Mosaic Version-
Chain 56; begin Row 1 in the 2nd ch from hook, working in the ‘back bumps’ of the chain.
Row 1: BE, 51sc, EE
Row 2: BE, 51sc, EE
Row 3: BE, 4ddc, (sc, 5ddc)x7, sc, 4ddc, EE
Row 4: BE, 4sc, (ddc, 5sc)x7, ddc, 4sc, EE
Row 5: BE, (3ddc, 3sc)x8, 3ddc, EE
Row 6: BE, (3sc, ddc, sc, ddc)x8, 3sc, EE
Row 7: BE, sc, (ddc, 2sc)x16, ddc, sc, EE
Row 8: BE, (ddc, sc, ddc, 3sc)x8, ddc, sc, ddc, EE
Row 9: BE, (3sc, 3ddc)x8, 3sc, EE
Row 10: BE, sc, (ddc, 5sc)x8, ddc, sc, EE
Row 11: BE, ddc, (sc, 5ddc)x8, sc, ddc, EE
Row 12: BE, 51sc, EE
Row 13: BE, 4ddc, (sc, 5ddc)x7, sc, 4ddc, EE
Row 14: BE, 51sc, EE
Row 15: BE, 4ddc, sc, 9ddc, sc, 3ddc, 7sc, 3ddc, sc, 7ddc, sc, 3ddc, 5sc, 6ddc, EE
Row 16: BE, 4sc, ddc, 9sc, ddc, 9sc, ddc, 3sc, ddc, 7sc, ddc, 2sc, ddc-L, 5sc, ddc-R, 5sc, EE
Row 17: BE, 4ddc, (sc, 9ddc)x2, sc, 3ddc, sc, 7ddc, sc, 2ddc, sc, 5ddc, sc, 5ddc, EE
Row 18: BE, 4sc, (fpddc, 9sc)x2, fpddc, 3sc, fpddc, 7sc, fpddc, 9sc, fpddc-R, 4sc, EE
Row 19: BE, 4ddc, (sc, 9ddc)x2, sc, 3ddc, sc, 7ddc, sc, 9ddc, sc, 4ddc, EE
Row 20: BE, 4sc, (fpddc, 9sc)x2, fpddc, 3sc, fpddc, 7sc, fpddc, 9sc, fpddc, 4sc, EE
Row 21: BE, 4ddc, (sc, 9ddc)x2, sc, 3ddc, sc, 7ddc, sc, 9ddc, sc, 4ddc, EE
Row 22: BE, 4sc, (fpddc, 9sc)x2, fpddc, 3sc, fpddc, 7sc, fpddc, 9sc, fpddc, 4sc, EE
Row 23: BE, (4ddc, sc,)x3, 9ddc, sc, 3ddc, 9sc, 9ddc, sc, 4ddc, EE
Row 24: BE, 4sc, fpddc, 3sc, ddc-L, sc, ddc-R, 3sc, fpddc, 9sc, fpddc, 3sc, fpddc, 7sc, fpddc, 9sc, fpddc, 4sc, EE
Row 25: BE, 4ddc, sc, 3ddc, sc, ddc, sc, 3ddc, sc, 9ddc, sc, 3ddc, sc, 7ddc, sc, 9ddc, sc, 4ddc, EE
Row 26: BE, 4sc, fpddc, 2sc, fpddc-L, 3sc, fpddc-R, 2sc, fpddc, 9sc, fpddc, 3sc, fpddc, 7sc, fpddc, 9sc, fpddc, 4sc, EE
Row 27: BE, 4ddc, sc, 2ddc, sc, 3ddc, sc, 2ddc, sc, 9ddc, sc, 3ddc, sc, 7ddc, sc, 9ddc, sc, 4ddc, EE
Row 28: BE, 4sc, fpddc, sc, fpddc-L, 5sc, fpddc-R, sc, fpddc, 9sc, fpddc, 4sc, fpddc-R, 5sc, fpddc-L, 9sc, fpddc-L, 5sc, EE
Row 29: BE, 4ddc, sc, ddc, sc, 5ddc, sc, ddc, sc, 9ddc, sc, 4ddc, sc, 5ddc, sc, 3ddc, (sc, 5ddc)x2, EE
Row 30: BE, 4sc, fpddc, fpddc-L, 7sc, fpddc-R, fpddc, 9sc, fpddc, 5sc, fpddc-R, 3sc, fpddc-L, 5sc, ddc-R, 3sc, fpddc-L, 6sc, EE
Row 31: BE, 4ddc, 2sc, 7ddc, 2sc, 9ddc, sc, (5ddc, 5sc)x2, 6ddc, EE
Row 32: BE, 51sc, EE
Row 33: BE, 51ddc, EE
Rows 34: BE, 51sc, EE
Row 35: BE, 51ddc, EE
Row 36: BE, 51sc, EE
Row 37: BE, 13ddc, sc, (3ddc, 7sc)x2, 3ddc, (sc, 6ddc)x2, EE
Row 38: BE, 13sc, (ddc, 9sc)x2,, ddc, 4sc, ddc-R, 5sc, ddc, 6sc, EE
Row 39: BE, 13ddc, (sc, 9ddc)x2, sc, 4ddc, sc, 5ddc, sc, 6ddc, EE
Row 40: BE, 13sc, (fpddc, 9sc)x2, fpddc, 5sc, fpddc-R, 4sc, fpddc, 6sc, EE
Row 41: BE, 13ddc, (sc, 9ddc)x2, sc, 5ddc, sc, 4ddc, sc, 6ddc, EE
Row 42: BE, 13sc, (fpddc, 9sc)x2, fpddc, 6sc, fpddc-R, 3sc, fpddc, 6sc, EE
Row 43: BE, 13ddc, (sc, 9ddc)x2, sc, 6ddc, sc, 3ddc, sc, 6ddc, EE
Row 44: BE, 13sc, (fpddc, 9sc)x2, fpddc, 7sc, fpddc-R, 2sc, fpddc, 6sc, EE
Row 45: BE, 8ddc, 6sc, (5ddc, 5sc)x2, 7ddc, 4sc, 6ddc, EE
Row 46: BE, 6sc, ddc-2L, 6sc, (fpddc, 9sc)x2, fpddc, 6sc, fpddc-L, 3sc, fpddc, 6sc, EE
Row 47: BE, (6ddc, sc)x2, (9ddc, sc)x2, 6ddc, sc, 3ddc, sc, 6ddc, EE
Row 48: BE, (6sc, fpddc)x2, (9sc, fpddc)x2, 5sc, fpddc-L, 4sc, fpddc, 6sc, EE
Row 49: BE, (6ddc, sc)x2, (9ddc, sc)x2, 5ddc, sc, 4ddc, sc, 6ddc, EE
Row 50: BE, (6sc, fpddc)x2, (9sc, fpddc)x2, 4sc, fpddc-L, 5sc, fpddc, 6sc, EE
Row 51: BE, (6ddc, sc)x2, (9ddc, sc)x2, 4ddc, sc, 5ddc, sc, 6ddc, EE
Row 52: BE, 8sc, fpddc-2R, 4sc, (fpddc, 9sc)x2, fpddc, 3sc, fpddc-L, 6sc, fpddc, 6sc, EE
Row 53: BE, 8ddc, 6sc, (3ddc, 7sc)x2, 3ddc, (sc, 6ddc)x2, EE
Row 54: BE, 51sc, EE
Row 55: BE, 4ddc, (sc, 5ddc)x7, sc, 4ddc, EE
Row 56: BE, 51sc, EE
Row 57: BE, ddc, (sc, 5ddc)x8, sc, ddc, EE
Row 58: BE, sc, (ddc, 5sc)x8, ddc, sc, EE
Row 59: BE, (3sc, 3ddc)x8, 3sc, EE
Row 60: BE, ddc, (sc, ddc, 3sc, ddc)x8, sc, ddc, EE
Row 61: BE, sc, (ddc, 2sc)x16, ddc, sc, EE
Row 62: BE, (3sc, ddc, sc, ddc)x8, 3sc, EE
Row 63: BE, (3ddc, 3sc)x8, 3ddc, EE
Row 64: BE, 4sc, (ddc, 5sc)x7, ddc, 4sc, EE
Row 65: BE, 4ddc, (sc, 5ddc,)x7, sc, 4ddc, EE
Finishing Background Color Row 66: BE, 51sc in BOTH LOOPS across, EE
Envelope Border
- This pattern utilizes an LDC (linked double crochet) Envelope Border, but you can use regular dc stitches if you prefer. You can see a video of LDC here. My video shows working into the back+3rd loop on the second and following rounds…but this is not necessary and I didn’t use that version on this blanket (I just haven’t had time to redo the video).
Front Border – worked with the front of the block facing you
Rnd 1: Join border color into the front loop of the top right chain space with a standing dc, then work (LDC, ch2, dc, LDC) all into the same back loop. Ldc in the FLO of each sc across the top, (2LDC, ch2, dc, LDC) into the front loop of the ch-sp at the other end. Now work a LDC in the FL of each ch-sp down the side; (2LDC, ch2, dc, LDC) into the last ch-sp (this is into the skipped chain of your starting chain), Ldc in the FLO of each ch across the bottom; repeat inside finish the starting corner with a Ldc into the back loop of the ch-sp. Slst to join.
Rnds 2-3: Stacked dc in same st as joining. Ldc around, working (2LDC, ch2, dc, LDC) in the corner ch sps. Slst to join. Sew in the end at the end of round 3.
Back Border – worked with the back of the block facing you
Rnd 1: Repeat Row 1 above, working into the back loop of the ch sps and sc sts all around.
Rnds 2-3: same as front border above
Trim all ends to 2-3 inches long. I like to cut mine to be as long as the border is thick (it’s also an easy cutting line).
Closing Round: As you work this round, keep your ends laid down inside.
Join border color into the top right (or top left for lefties) ch2 space with a standing sc (work this standing sc around both ch2 sps) then work 4sc more into the same corner space.
Now sc along the side into the two inside most loops when the borders are sandwiched together. Work 5sc in the next corner ch2 sp (around both ch2 spaces). Work in this manner around your blanket. Join to first sc with an invisible join. Sew in final end well – as it does not have a knot.
Leave a Reply